-40%
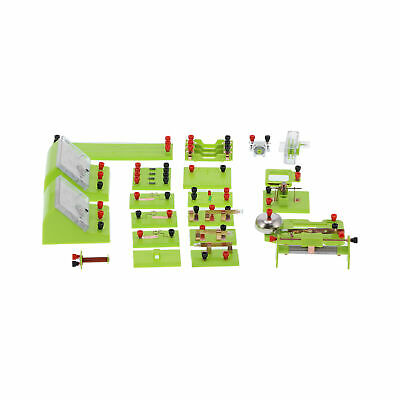
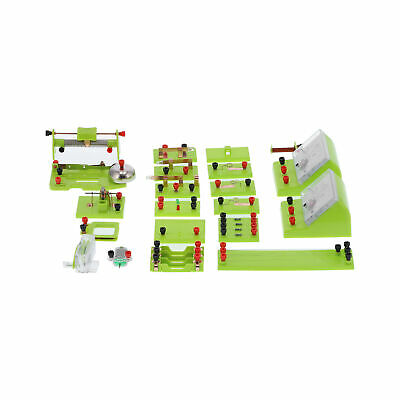
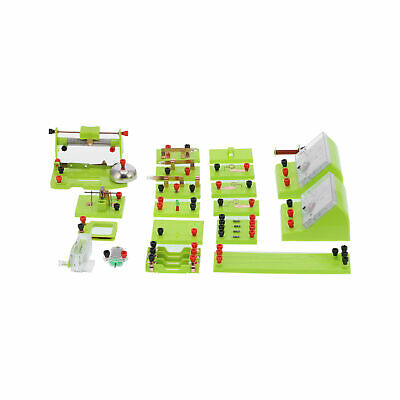
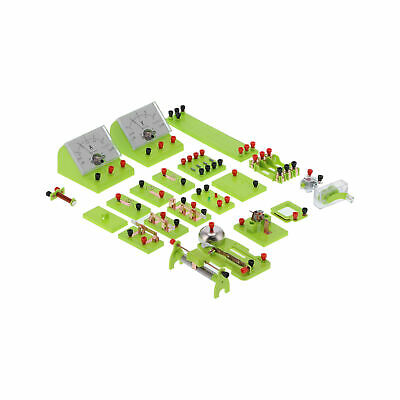
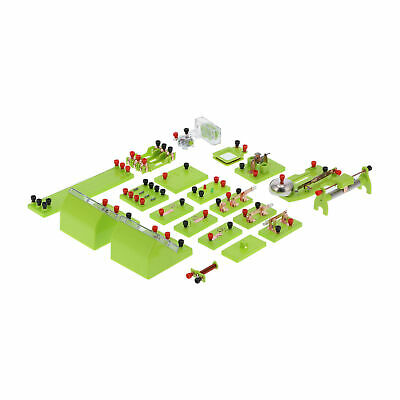
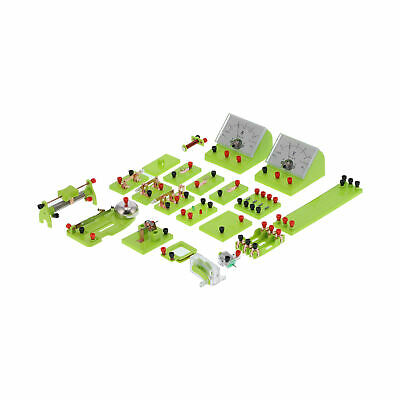
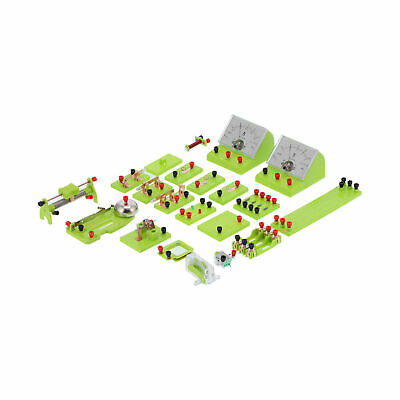
A2 Electromagnetics Experiment Box Set Electromagnetic Physical Teaching Tool
$ 40.34
- Description
- Size Guide
Description
A2 Electromagnetics Experiment Box Set Electromagnetic Physical Teaching ToolFeature:
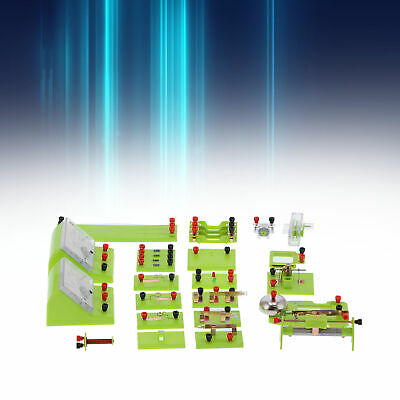
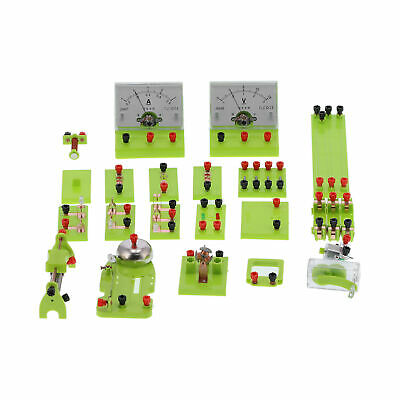
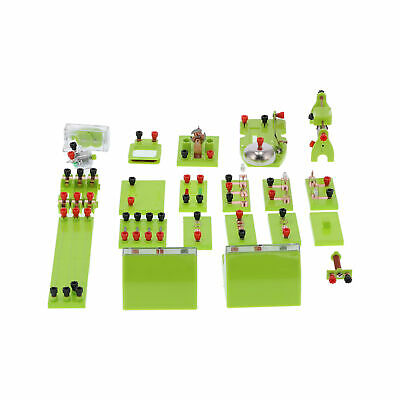
1. The equipment is complete, including a complete set of electromagnetic teaching equipment, which is convenient for teachers to use in teaching.
2. Rugged and durable, with complete equipment, good quality, not easy to damage, and repeatable experiments.
3. With a variety of electromagnetic experiments, it is more intuitive, vivid and specific, which is convenient for students to understand and learn.
4. The measurement is accurate, and the measurement data of the physical electromagnetic experiment box is available for direct use.
5. Applicable experiments, such as series circuit and parallel circuit, current and voltage measurement experiments, etc.
Specification:
Item Type: Physical Experiment Kit
Material: ABS
Model: A2
Battery: 1.5V 3xAA Batteries (Not Included)
Purpose: Battery teaching experiment in middle and high school
Applicable experiment:
1. Static Electricity, Electric Charge
1) Experimental Equipment: 2 x Glass Rods, rubber rods, multi-function brackets, silk, fur
2) Practical Operation:
① Rub the two glass rods with silk, gently place one glass rod on the holder (so that it can rotate freely), and hold the other glass rod close to the glass rod on the holder. Observe the phenomenon.
② Hold the rubber rod rubbed with fur, and approach the glass rod rubbed with silk on the support. Observe the phenomenon.
2. Know simple circuits
1) Experimental Equipment: 2 x Batteries (Not Included), a battery box, a light bulb, a lamp holder, a number of wires, and a switch.
2) Practical Operation: Connect the battery, lamp holder, and switch with wires as shown in the figure to make the small bulb glowing and control its on and off.
3. Use light-emitting diodes to study the direction of current
1) Experimental equipment: 2 x Batteries (Not Included), battery box, several wires, light-emitting diodes, and a switch.
2) The diode has the characteristic of unidirectional conduction. The current flows in from the anode of the light-emitting diode and flows out from the cathode, and the light-emitting diode emits light. If current flows in from the cathode of the light-emitting diode, the light-emitting diode does not emit light. Based on this, the direction of the current can be explored.
Note: The light-emitting diodes in this set of experimental equipment can only use 2 x Batteries, otherwise it will be broken down and damaged.
4. Connect series circuit and parallel circuit
1) Experimental Equipment: batteries (Not Included), battery box, bulbs, wires, lamp holders, switches.
2) Practical Operation:
①Compose the circuit, observe and explore the characteristics of the circuit current;
②Change the switching method, explore the role of the series circuit switch, and explore the characteristics of the series circuit:
③Form a parallel circuit, analyze the direction of the current; close each switch separately, look at the function of each switch in the parallel circuit, and analyze which part is a branch circuit and which part is a main circuit.
5. Use an ammeter to measure current
1) Experimental Equipment: 1 x Battery (Not Included), battery box, ammeter, one bulb, one lamp holder, several wires, and one switch.
2) Practical Operation:
①Estimate the current and select the range before measuring.
②The ammeter can be connected to the circuit correctly and connected in series.
③Connect the circuit as shown in the figure to measure the current of a bulb and learn the reading of the ammeter.
④It is absolutely not allowed to connect the ammeter directly to the circuit without any electrical appliances, otherwise the ammeter may be burnt out.
6. Measure the voltage with a voltmeter
1) Experimental Equipment: Battery (Not Included), battery box, voltmeter, bulb, lamp holder, several wires, switch.
2) Experimental Operation:
①Recognize the scale of the voltmeter, recognize the two ranges of the voltmeter and the corresponding corresponding division values.
②The voltmeter can be connected to the circuit correctly.
③Connect the diagram to the circuit. When the small bulb is on, use a voltmeter to measure the voltage at both ends of the bulb. What is the voltage across the bulb when the light bulb is off?
7. Exploring the law of series battery pack voltage
1) Experimental equipment: 3 x batteries (Not Included), battery box, a voltmeter, several wires, and a switch.
2) Practical Operation:
①Use a voltmeter to measure the voltage of three single-cell batteries, then connect two of them in series to measure the voltage, and analyze the relationship between the total voltage of the two batteries in series and the voltage of each cell.
②Re-measure the relationship between the total voltage of the battery composed of 3 batteries and the voltage of each battery.
8. Explore the law of parallel battery pack voltage
1). Experimental equipment: 3 x batteries (Not Included), battery box, a voltmeter, a number of wires, a switch
2) Practical operation: Measure the voltage of one battery according to the previous section, then connect the batteries of the same voltage in parallel, and analyze the relationship between the voltage after the parallel connection and the original voltage of each battery.
9. Test conductors and insulators
1) Experimental Equipment: 2 x Batteries (Not Included), battery box, an ammeter, 1 light bulb, several wires, a switch, an eraser, a knife, coins, a ruler (you need to bring your own) and other solid objects that can be found nearby And liquid.
2) Practical operation: connect common school supplies erasers, knives, magnets, and rulers to the circuit to see if the light bulb in the circuit is shining.
3) expand the experiment:
① Use an ammeter to break the electrical conductivity of the object. If the bulb does not light up in the experiment, it does not necessarily mean that the connected object is an insulator. It is possible that the conductivity of the object is relatively poor, so that the current in the circuit is relatively small, and it is not enough to make the bulb light. At this time, you can replace the bulb with an ammeter. Compare the current readings.
②Use a voltmeter to judge the conductivity of the object. If the reading of the voltmeter is equal to the power supply voltage, it means that the object is a good conductor. If the reading of the voltmeter is zero, it means that the object is an insulator.
10. Explore the factors that affect conductor resistance
1) Explore the relationship between the resistance and length of the conductor, control the material and cross-sectional area of the conductor unchanged, use 0.2m chromium-preserving wire to do the experiment, record the measurement data into the table, and calculate the resistance value.
2) Explore the relationship between the resistance of the conductor and the thickness; control the material and length of the conductor unchanged, use 2mm nickel-chromium wire and 0.4mm nickel-chromium wire to do the experiment, know the resistance of 0.2mm nickel-chromium wire, set 0.4mm nickel-chromium wire The measurement data of the wire is recorded in the table, and the resistance value is calculated.
3) Explore the relationship between the resistance of the conductor and the material; control the length and thickness of the conductor unchanged. Experiment with 0.2mm constantan wire and 0.2mm nickel chrome wire, know the resistance value of 0.2mm nickel chromium wire, record the measurement data of 0.2mm constantan wire into the table, and calculate the resistance value.
11. Use a sliding rheostat to change the brightness of the bulb
1) Experimental Equipment: 3 x Batteries (Not Included), batteries, battery box, voltmeter, 1 x bulb, 1 x lamp holder, sliding resistor, several wires, and a switch.
2) Practical operation: connect the circuit, move the slide of the sliding rheostat, and observe the brightness change of the bulb.
12. Make fruit batteries
1) Equipment: copper sheet, zinc sheet, wire, sensitive voltmeter, fruit (self-provided acidic fruit beverage)
2). Experimental operation:
Insert the copper piece and the zinc piece into the fruit, connect the wire, the sensitive voltmeter, and observe the reading of the voltmeter.
13. Magnetization
1) equipment; iron nails, book nails, and other light and small iron objects
2) As shown in the operation, move the magnet close to the nail without touching it, and let the lower end of the nail attract the staple. If it is attracted, then remove the magnet to see if the staple is attracted to the nail. Will fall.
14. Magnetic car
1) equipment: magnetic car
2) practical operation:
① Put a magnetic trolley on a horizontal table and use another magnetic trolley to approach it and observe the phenomenon.
② Adjust the direction of the magnetic trolley once.
③Put a magnetic car on top of another magnetic car to move and observe the phenomenon.
15. Magnetic levitation experiment
1) Equipment: Multifunctional bracket, ring magnet (2 pcs)
2) Practical operation: Put one ring magnet on the multifunctional bracket and put the other ring magnet on it to observe the phenomenon; put the other ring magnet on the other direction and observe the phenomenon.
16. Ring magnet
1) equipment: two ring magnets
2) Practical operation: pull the two ring magnets sideways to each other, put one of them on the thumb and rotate it, and observe the phenomenon.
17. Explore the existence of a magnetic field and the direction of the magnetic field around the magnet
1) Equipment: bar magnet, compass
2) Practical operation: Put the bar magnet on the desktop, place the compass at different positions of the magnet, and observe the compass pointing when it is stationary.
18. Distribution of magnetic field
1) Equipment: bar magnet. Horseshoe magnet, iron filing box (iron powder box)
2) practical operation:
①Put the bar magnet on the iron filing box and vibrate the box lightly.
②Put the horseshoe-shaped magnet on the iron filing box, repeat the above experiment, and record the shape description at the same time.
Tip: In science, this kind of line describing the distribution of the magnetic field is called the magnetic line of induction.
19. The Oersted Experiment
1) Equipment: 3 x batteries (Not Included), battery box, compass, a number of wires, resistance, switch
2) practical operation:
①Place the wire above the small magnet in the direction of the N and S poles of the small magnetic needle, and then quickly close the switch and then quickly disconnect it. Observe the response of the small magnetic needle at the moment of energization, then change the direction of the current through the wire, and then observe the response of the small magnetic needle.
②Analysis and conclusion: Oersted’s experiment shows that the current exists around
This phenomenon is also called the effect of electric current; Oersted’s experiment is the first time that humans have realized that electrical and magnetic phenomena are intrinsically connected.
20. Improved scheme of Oersted experiment
1) equipment: 3 x batteries (Not Included), rectangular coil, switch, compass, several wires
2) practical operation:
① Connect the battery, wire, rectangular coil, and switch in sequence to form a closed loop;
②Put the compass on the horizontal table to ensure that it can rotate freely in the horizontal position;
③Turn off the switch and bring one end of the rectangular coil close to the compass. Observe the phenomenon and record it in the form;
④Close the switch and bring one end of the rectangular coil close to the compass. Observe the phenomenon and record it in the form;
⑤On the basis of step ④, move the opposite side of the rectangular coil close to the compass. Observe the phenomenon and record it in the form;
21. Explore the magnetic field of energized solenoids
1) Equipment: 2 x batteries (Not Included), battery box, switch, compass, electromagnet
2) practical operation:
①Connect the circuit, place the compass around the power-on solenoid, and observe the rotation of the pointer after power-on.
②Turn on the switch and put the compass to a different position, then close the switch and observe the rotation of the pointer.
③Choose the same position and change the direction of the current to observe the phenomenon?
Note: The time for each pass cannot exceed 1-2 seconds.
22. Explore the factors that affect the strength of electromagnets
1) Equipment: 2 x batteries (Not Included), battery box, switch, wire, electromagnet, adiabatic meter, sliding rheostat, staples
2) practical operation:
①Connect the electromagnet to the circuit components and connect them in series in the circuit: pay attention that the switch is in the open state and the sliding rheostat is at the maximum resistance value when the circuit is connected.
②Close the switch and observe the reading of the ammeter. At the same time, use the electromagnet to attract the staples and record the number of attraction. Then move the sliding rheostat to make the resistance smaller, observe the change of the current indication, and record the number of the attracted staples.
③Refer to the steps ②How to study the relationship between the strength of the electromagnet's magnetism and the number of turns of the coil?
④What do you think of the magnetism of electromagnets? Please design experiments to verify.
3) draw a conclusion
23. How to make the electric bell ring continuously
1) Equipment: 3 x batteries (Not Included), battery box, switch, wire, electric bell, electromagnet
2) Operation: Connect the circuit, close the switch, can the armature vibrate continuously and make a sound? Please analyze its working process.
Note: The electroplated armature is a combination of spring and screw cap, and the distance close to the bell stop can be adjusted with a screwdriver.
24. Ampere force experiment:
1) Connect the circuit and continuously close the switch
2) Thinking:
①How to judge the direction of ampere force?
②What will you find if you change the positive and negative poles of the battery?
25. Observe the effect of the magnetic field on the energized conductor
1) Equipment: 3 x batteries (Not Included), battery box, switch, wire, hoof magnet, metal guide rail, copper rod.
2) Operation: As shown in the figure, put the copper rod in the magnetic field and pull on the power, let the current pass through the copper rod, and observe the phenomenon.
26. Exploring small motor power generation
1) equipment: wire, motor, ammeter, U-shaped magnet
2) Operation: Connect the circuit, quickly rotate the motor shaft, and observe whether the ammeter will deflect.
27. The structure of the motor
1). Equipment: 2 x batteries (Not Included), battery box, wire, electric motor, U-shaped magnet
2). Operation:
① Observe the motor and identify some main structures on the motor.
②Connect the circuit, close the switch, and observe the direction of rotation of the motor.
③Try various changes to change the direction of the current, reverse the polarity of the magnet, and explore the relationship between the direction of rotation of the motor and the direction of the current and the direction of the magnetic field.
28. Student hand-cranked generators for power generation (gearbox power generation)
1), equipment: hand-cranked generator, bulb, lamp holder, ammeter, voltage, motor model
2) Operation:
① As shown in the figure, connect the circuit, quickly turn the hand-cranked generator for students, and shake it at a constant speed.
② Observe the brightness of the small bulb.
③ Observe whether the pointer of the ammeter changes? And study whether the direction of rotation will affect the direction of current, note: the ammeter is connected to "-" "3A" or the ammeter will burn out.
④ Observe whether the pointer of the voltmeter changes? And study how much you can achieve. Note: Connect "-" and "15V" to the voltmeter, otherwise the voltmeter will burn out.
⑤Gear gearbox. After we crank the gearbox by hand, how many revolutions of the motor motor is equivalent to.
29. Joule's law: Q=I²RT
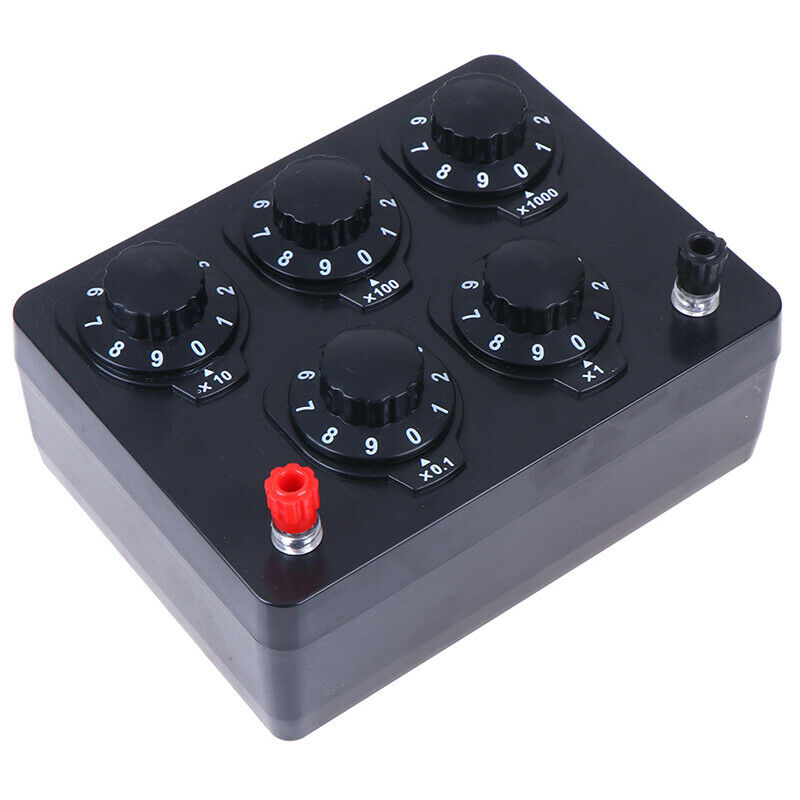
1) Equipment: Joule's law base plate, 2 x 10Ω resistance boxes, 1 x 5Ω resistance box, 2 x thermometers, battery box, battery (Not Included), several wires.
2) Operation:
① Explore the relationship between heat and resistance.
Connect the 5Ω resistance box and the 10Ω resistance box in series, control the current (I) the same, observe the change of the thermometer, explore the relationship between heat and resistance, and draw conclusions.
② Explore the relationship between heat and current.
Connect the 10Ω resistance box in parallel with the 10Ω resistance on the bottom plate, and then connect it in series with another 10Q resistance box. The control resistance (R) is the same. Observe the change of the thermometer, explore the relationship between heat and current, and draw a conclusion.
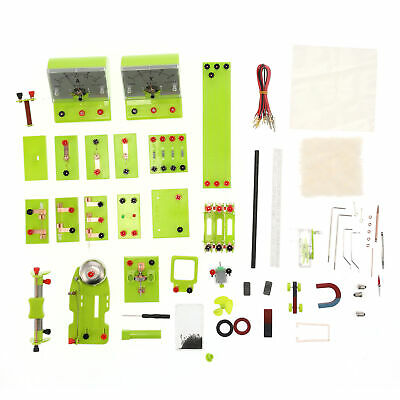
Package List:
1 x Ammeter
1 x Voltmeter
1 x Motor Seat
3 x Battery Holder
1 x Electric Bell
1 x Hand Crank Motor
1 x Coil
1 x Sliding Resistance
1 x Resistance Wire Seat
1 x Scrap Box
10 x Wire
1 x Screwdriver
1 x Rubber Rod
2 x Glass Rod
1 x Diode Holder
3 x Bulb Holder
3 x Switch
1 x Resistance Seat
7 x Magnet
1 x Silk Cloth
1 x Fur Cloth
1 x Fan Blade
1 x Enameled Coil
3 x Bulb
1 x Compass
9 x Metal Fittings
5 x Nut
1 x Wrench
1 x Plastic Box
We accept PayPal .
We ship item to your PayPal verified address.
Payment must be received within 3 days from the date of purchase.
All the items will be dispatched within one business day by Airmail after the payment is clear.
Most times you will receive your order within 10-30 business days after we transfer your package to the delivery company. We cannot guarantee the delivery timeframe if the post office has any unexpected delays due to holiday, weather, customs, or other conditions. Some countries like Russia, Brazil, or some European countries may take up to 50 days or longer for delivery.
We appreciate your patience if you haven't received items in 30 days(Russian customers may need more patience by reason of the local delivery system and/or customs). If you are concerned in any way, please feel free to contact us via ebay message
instead of leaving negative/neutral feedback or opening a dispute
.
We will make every effort to fix any problem(resend or refund any missing item).
Customs duty is obligation and liability of
citizen
s in your country, so buyer should be responsible for any tax and custom duty incurred. Generally, the delay or failure delivery is sometimes caused by the policy of different customs.
1. Our listing price includes the value of goods,packaging cost,and export
taxes,not including international duties.
2. duties,taxes,and charges are not included in the item price or shipping fee.
3.
T
he duties are buyers' responsibility
.Please check with your country's
customs office determine what these additional costs will be prior to your
purchase.
4. All disputes arising from the duties will be submitted to ebay for solution.
1. Any questions,
pls. contact us via ebay message or email us.
We will reply your message within 48 hours. If you do not receive our reply within 48 hours, pls. post a message again because sometimes our message system may block some emails.
2. If you are satisfied with our service, pls. kindly leave us a positive feedback and give us the Detailed Seller Rating with all "
5
" in very area
3. Our aim is to provide Level Customer Service, your recognition will encourage us greatly and serve you better.
We strive to keep all our customers satisfy.
We will do our up most to exceed your expectations in customer service, communication and dispatching of your orders.

